
Potato and Fennel Hash Skillet
This potato and fennel hash skillet meal makes for a very special breakfast/brunch, but it also works nicely as a wholes...
Read Recipe
This potato and fennel hash skillet meal makes for a very special breakfast/brunch, but it also works nicely as a wholes...
Read Recipe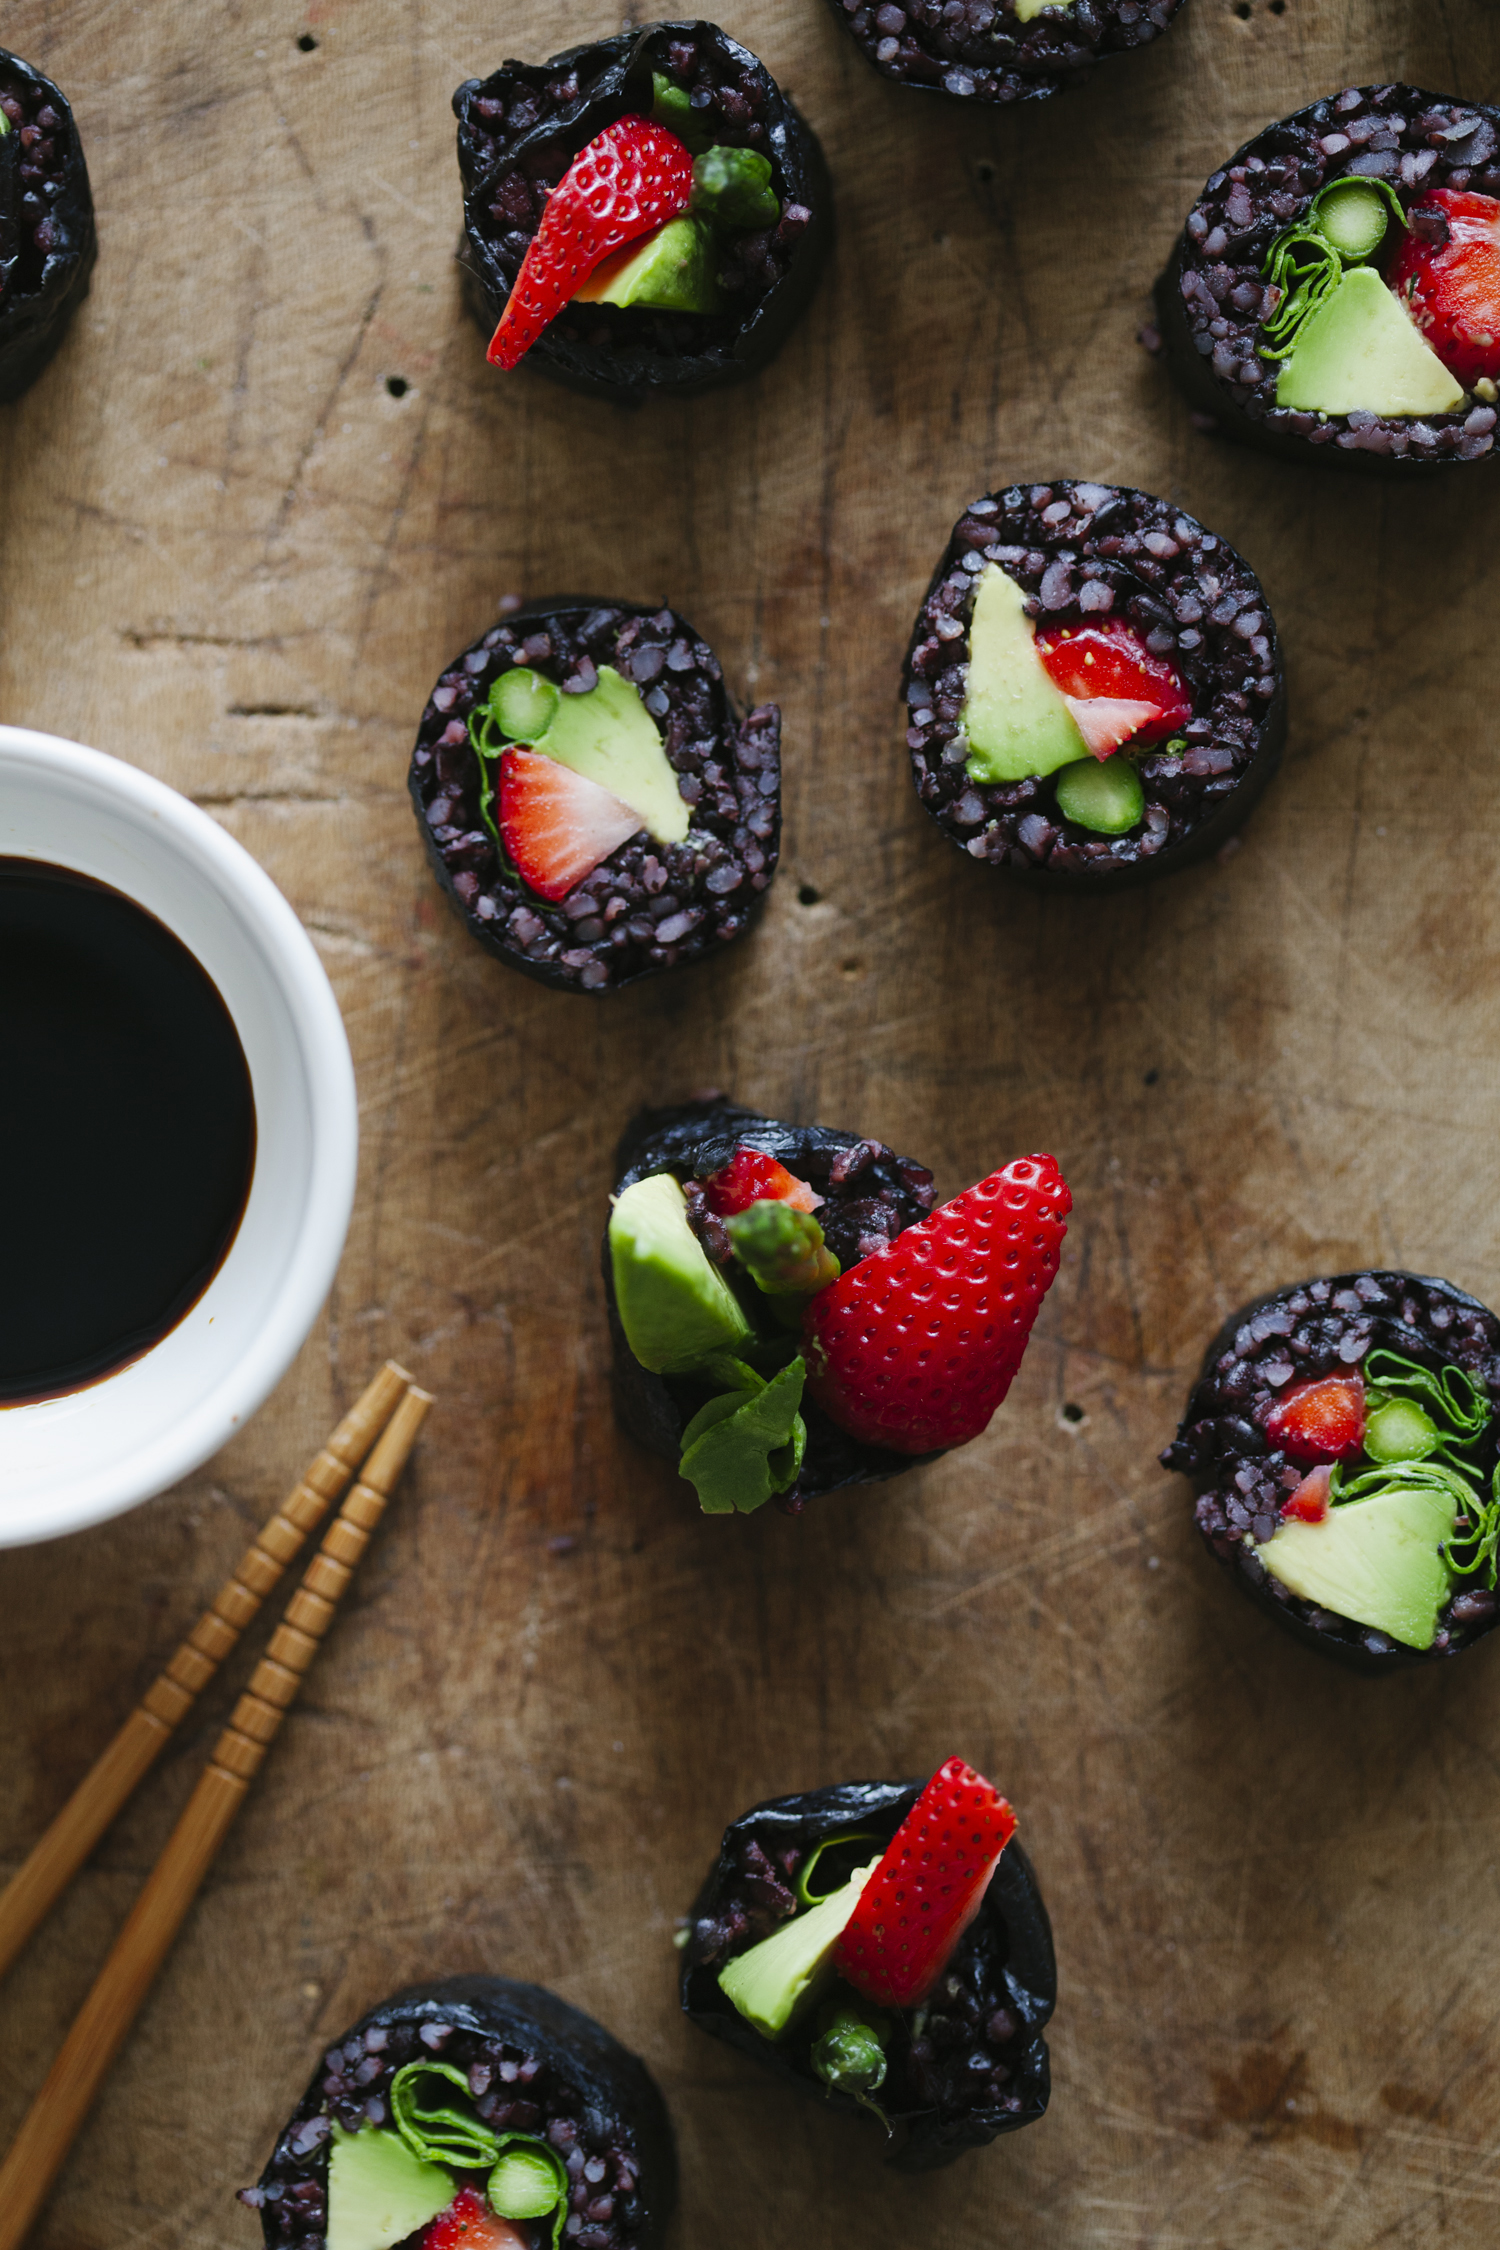
My kid is completely obsessed with sushi rolls, and I’m starting to figure out that it’s the format itself that elic...
Read Recipe
This dish combines our love for Indian spices, mushrooms, and a quiche. This was my first attempt at working with Irish ...
Read Recipe
When we first put together this plate of green, red, and pink, we were not expecting much of the result. After all, how ...
Read Recipe