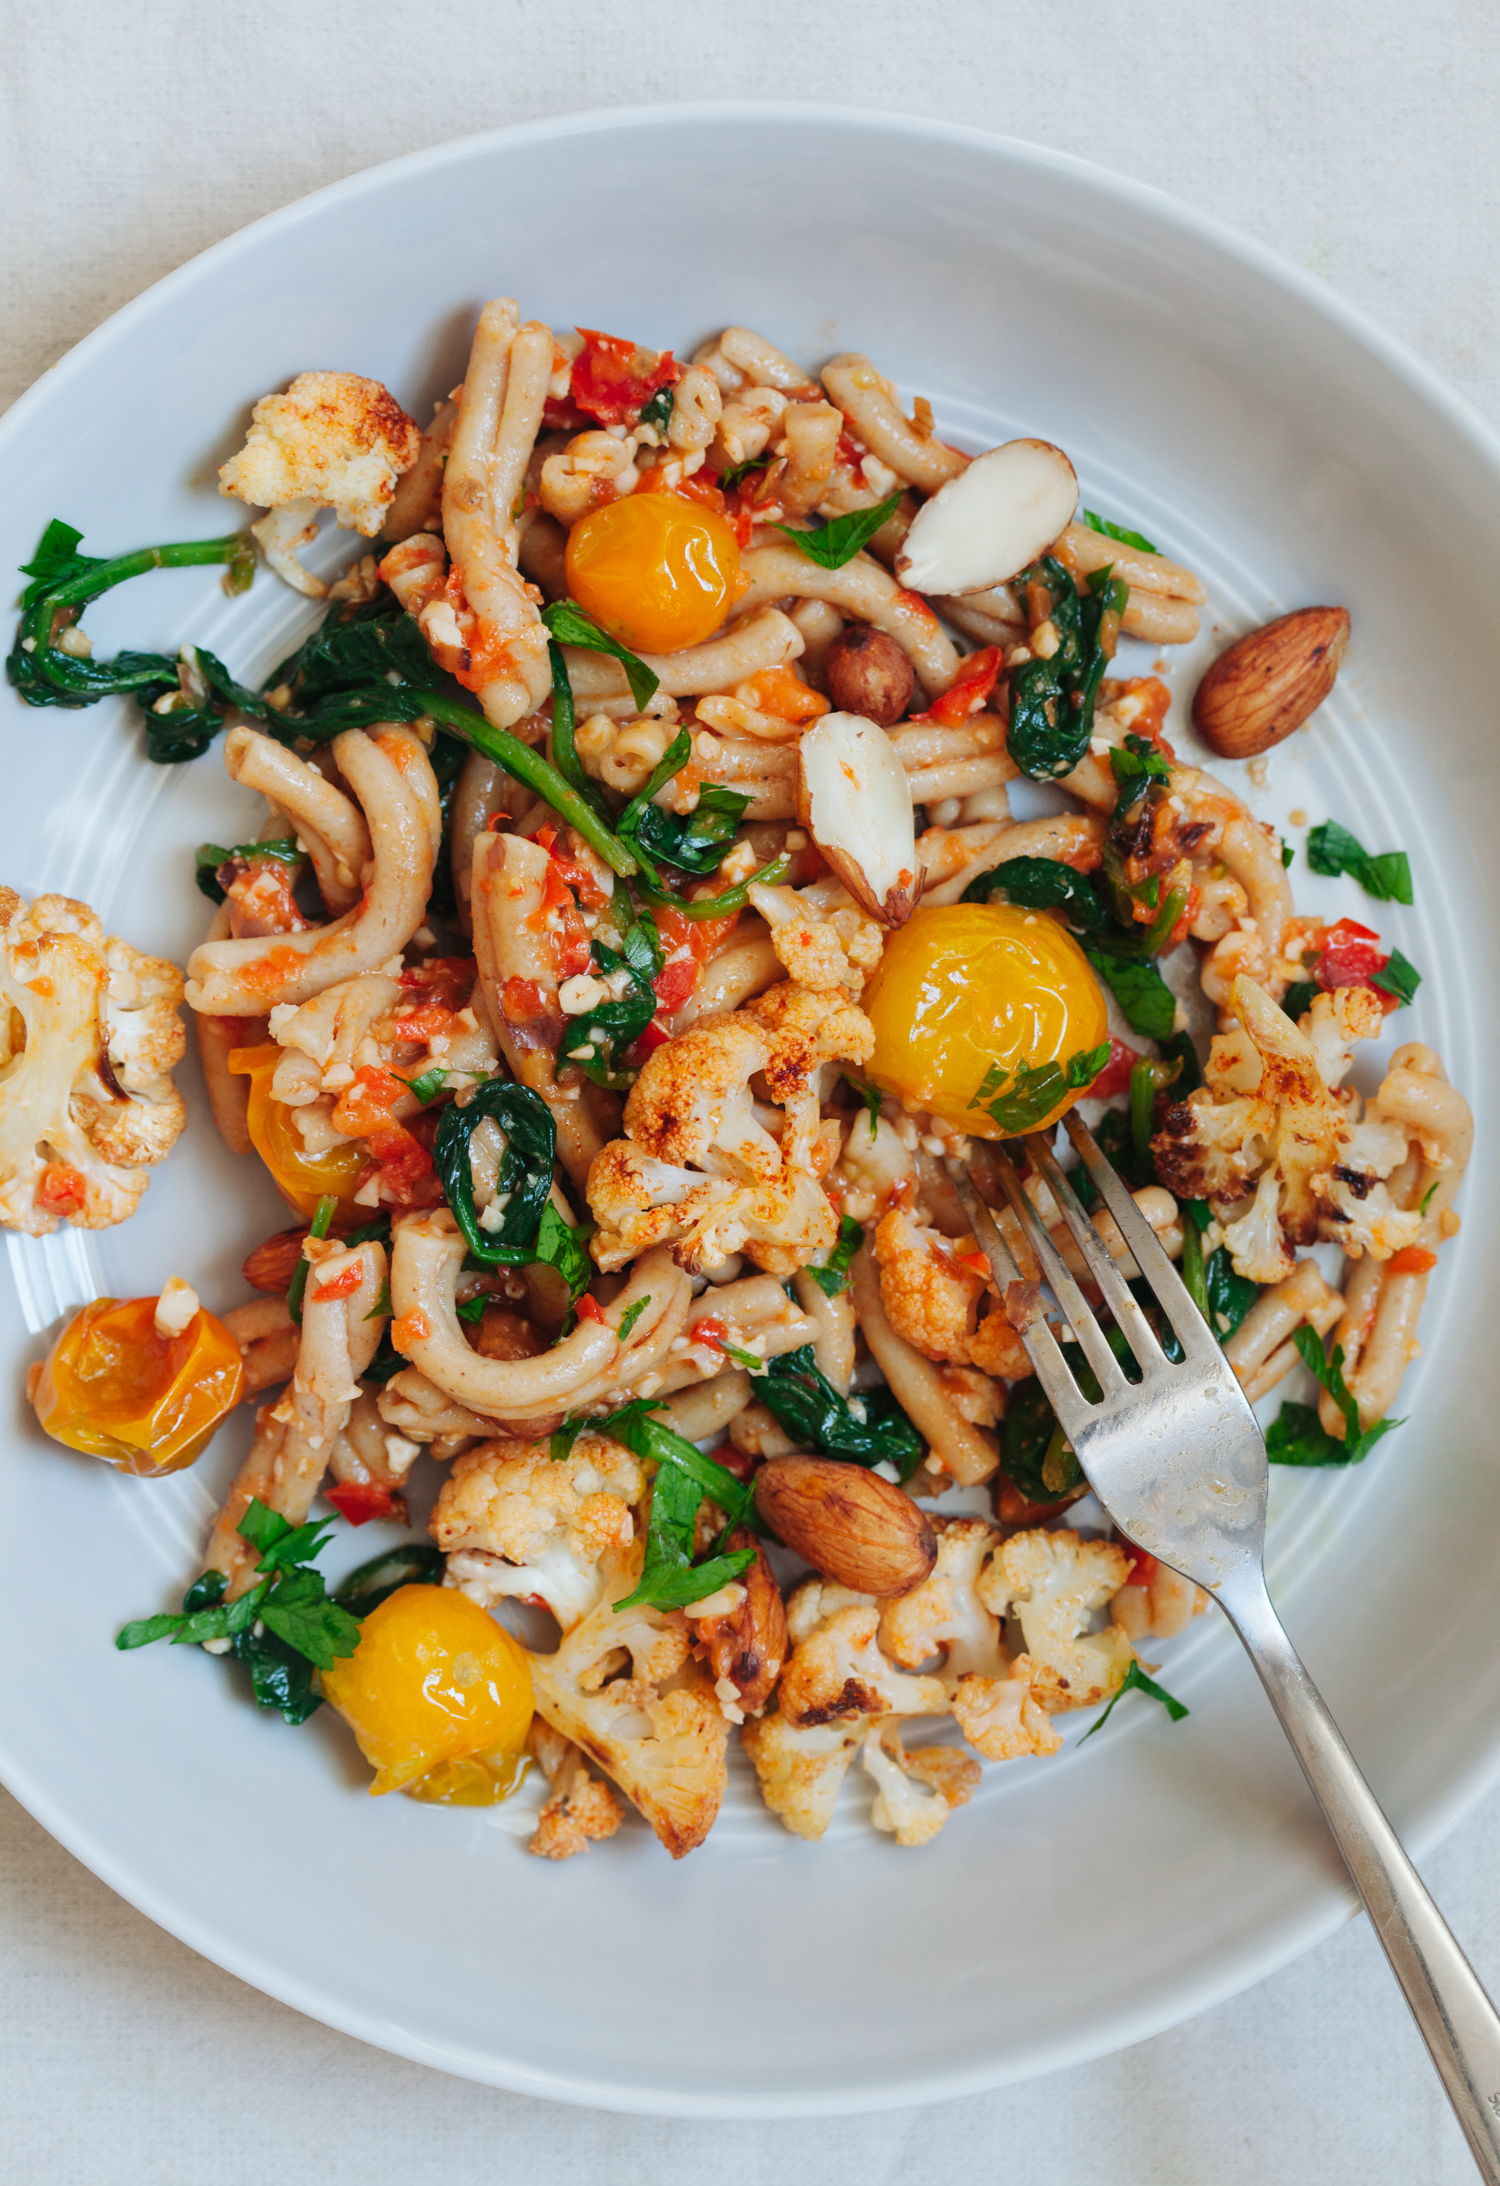
April 1st, 2015
I don’t mean to offend those who are passionate about their coffee by naming this drink cappuccino, but I can justify. The rich, foamy texture and deep flavor of this black sesame tea reminded me so much of all of cappuccino’s finest qualities, that I couldn’t resist giving it this name. I generally don’t drink coffee, but that changes as soon as I find myself on the other side of the Atlantic, where vacation mode and the magic of the European lifestyle make coffee into a very pleasant necessity for me. Otherwise, it’s always tea. Out of the caffeinated teas, good quality black, loose leaf tea is my drink of choice.
In my latest attempt to take a break from caffeine, I came across the possibility of using black sesame seeds and dates in a hot, tea-like drink. Chinese black sesame tea has long been known for its therapeutic properties. It is especially believed to nurture and restore hair strength, and is generally a great, calming whole body tonic, thanks to the overwhelming amount of nutrients in black sesame seeds.
When I made my version of black sesame seed tea for the first time, I couldn’t believe its rich taste and velvety texture. It really hit the spot and I’ve been drinking it in the morning for the past couple of weeks, not missing caffeine very much. Sesame seeds contain lots of lecithin, which, aside from helping keep your arteries flexible, accounts for the silky, creamy texture of this tea. In the absence of black sesame seeds, I’ve substituted with unhulled tan sesame seeds, which worked great as well.
I’ve included a recipe for another sesame drink I discovered while making my cappuccino. The taste of this milk reminds me of halva, one of my favorite childhood treats. This one is quick to prepare and quite satisfying in its own way.
Black Sesame Cappuccino
1 cup black sesame seeds (I like these)
2 soft dates – pitted
3 cups water
1 cup homemade almond milk or almond-sesame milk (see recipe below)
1. Combine sesame seeds, dates and water in a medium saucepan. Bring to a boil, adjust heat to a strong simmer and cook for 30 minutes, partially covered. The water volume should reduce by about 1/3. Towards the end, mash dates against the sides of the pan with a spoon, letting them further release their sweetness. Strain the liquid and collect black sesame seeds in a large strainer.
2. Pour the strained liquid back into the saucepan, add one cup of almond or almond-sesame milk and reheat gently. Add sweetener of choice, if needed (I find the subtle sweetness from dates to be enough). Optionally blend at high speed to make it foamy. Enjoy hot.
Note: Optionally, you can dry the leftover black sesame seeds for future use. To do that, spread them on a baking sheet and keep them in the oven at the lowest temperature for a couple of hours. When almost completely dried, turn off the oven and leave the seeds in until the oven is cold.
Halva Milk
2 cups homemade almond-sesame milk (see recipe below) – warmed if desired
2 tablespoons toasted black sesame seeds – ground in a coffee grinder
any preferred sweetener – to taste.
Combine all the ingredients in a blender until well combined and frothy. Enjoy hot or cold.
Almond Sesame Milk
1 cup almonds
1/4 cup unhulled sesame seeds
Soak almonds and sesame seeds in purified water overnight. Drain by catching the seeds in a fine-mesh strainer, rinse under cold water. Combine nuts and seeds in a strong blender with 4 cups of purified water. Blend until smooth. Strain through a nut bag or cheese cloth. Keep refrigerated for up to 3 days.
Tags: almond, black sesame, drink, sesame seed

June 10th, 2012
This post is also available in: French
This one is for all the recent graduates. Congratulations, it’s quite an accomplishment, what you did! We have our own grad in the family this year. My older daughter just completed four tough years at design school, and I wanted to make something very special to celebrate.
I often get asked about making a raw cake. Not a cheesecake or tart, but a proper layered Cake, capital C and all. This was just the occasion to tackle that.
Daisies have been blooming everywhere recently. Their yellow, festive middles, surrounded by a crown of delicate white petals always put the biggest smile on my face. I got the idea to use the daisy as a decorative element for the cake, as a symbol of spring and the newest of beginnings.
We’ve got five berry-filled layers of the gentlest texture, cloud-like and airy on your tongue. Then the whole blueberries interject with bursts of cooling freshness.
Paloma was completely enamored with the coconut daisies when I was making them, following along with the whole process, eager to have a taste. Lately, she has been taking much interest in the kitchen, and of course that warms my heart. Paloma made her own mini daisy cake and ate it, too.
Recently, we had the honor of contributing a recipe to a sweet little cookbook called Frugally Delicious. The book focuses on delicious cooking on a budget and is full of tasty recipes from many wonderful blogger contributors. It is honest, beautiful in its simplicity, and full of variety in the recipe index. Hop over to the book’s site to learn more.
We are giving away one copy of Frugally Delicious. Simply leave a comment to this post between now and Sunday, June 17th at 12pm EST to enter the giveaway.
Wild Blueberry Daisy Cake
(makes one 2 level round cake, first level – 6″ diameter x 4″ height, second – 3″ x 2″)
Cake Batter
12 ounces soft dates – chopped
1/4 plus 1 tablespoon coconut oil- melted
1 tablespoon vanilla extract
pinch of salt
4 cups plain almond pulp left from making almond milk
1 1/2 cup fresh blueberries
1-2 tablespoons freshly squeezed lemon juice
In a food processor, blend the chopped dates into a paste, add little bit of water if needed. Don’t worry if the paste is not completely smooth. Add coconut oil, vanilla, and salt. Continue mixing. Add the almond pulp, blueberries, lemon juice, and mix well to incorporate. Do it in two batches, if your food processor can’t handle the whole amount. You should end up with soft and light to touch cake batter. If your almond pulp is too wet, add a little more of it to your batter. If too dry, add some blueberries, or a splash of almond milk.
Blueberry Frosting
3 cups cashews – soaked for 2 hours
3 cups almond milk
1/2 cup light agave syrup
1 1/2 tablespoons freshly squeezed lemon juice
1 1/2 tablespoons vanilla extract or seeds of 1 vanilla bean
small pinch of salt
wild blueberry powder (optional) – to taste
1 1/4 cup coconut oil – melted
1 cup fresh blueberries
In a high speed blender, combine all the ingredients with the exception of blueberry powder, coconut oil, and blueberries until very smooth. If using, start adding the blueberry powder, to achieve the desired shade of purple. You can also use fresh blueberries to add taste and colour instead. Add the coconut oil at the end to emulsify. Reserve about 2 1/2 cups of for frosting the cake. Transfer the rest to a bowl and mix in the fresh blueberries.
Assembly
Separate the cake batter into four parts – three even ones and one for the small second level of the cake. If using a springform, lightly grease it with coconut oil. If using a cake pan without a removable bottom, line it with plastic or cake wrap. Spread one portion in the bottom of the pan in an even, flat layer. Top with a thick layer of frosting with the fresh blueberries. Put in the freezer for 1-2 hours, or until the cream is firm. Spread another layer of cake batter on top of the cream, following with the second layer of cream. Freeze for another 1-2 hours and finish with the last layer of cake batter. Put the cake in the freezer for 30 minutes before removing from the pan.
For the small second level, repeat the same steps, with only one frosting layer in between two layers of batter.
Frost the large cake first with the reserved frosting. Arrange the small cake on top and frost it. Arrange the daisies on top of the frosting. Keep refrigerated.
Coconut Daisies
These flowers were made by blending the meat of a young Thai coconut with a small amount of coconut water in a high speed blender. I didn’t measure the precise amounts, just eyeballed them. Then, I added dried shredded coconut and some agave and blended until I achieved a smooth, thick mixture. Then spread the mixture on Teflex-covered dehydrator trays, dried for an hour or until the surface became dry and I could cut out the flowers with a cookie cutter. After cutting, I left them in the dehydrator for another couple hours, until completely dry and easily separated. Towards the end of the dehydration time, I squeezed some fresh mango puree in the center of each flower, using a piping bag.