

March 23rd, 2014

Finally, our plans have been set in stone, the tickets have been bought and all the arrangements made. Paloma and I are flying to Moscow in a month. We’re staying in the city for a day to see some friends and then jumping on a train for the 24-hour ride down south to my hometown. Paloma has never yet been to Russia, and as hard as I imagine the 12 hour flight will be for her, I’m sure she’ll love the train. The rest of the family will join us at the end of May, when we intend to visit to a couple of other places in our region, including Sochi. We’ll be back in the States just in time for our cookbook release day – June 10th. I am getting very excited to see family and friends, all of whom I haven’t seen in years. I am also dreaming about all the delicious Russian food I will inevitably consume, prepared by some of the best cooks in my book – my mom, aunt, and girlfriends.
As any Russian, I grew up eating a lot of pies (pirozhki in Russian). Yeasty, doughy shells stuffed with meats, cabbage, eggs, rice, sorrel, or fruit. My favorites were always cabbage pies, that my mom makes with lightly sauteed cabbage and hard boiled eggs. The dough recipe for pirozhki is a frequent conversation subject among many Russian women – everyone has their own secret to the perfect dough. The question of ingredients, ratios, types of yeast, and oven temperature are not to be taken lightly. These days, I try to avoid pirozhki as much as I can, but individual homemade pies take me back to family tea times of my childhood like nothing else.
Since I often experiment with healthier, lighter varieties of doughs and fillings, I decided to share this lighter handpie recipe I’ve been coming back to often throughout the winter. And before peas and asparagus take over the greenmarkets, I thought I’d squeeze in some nourishing wintry flavors one last time. The pies are a curious combination of sweet and savory in one shell, combined with the ever-balancing flavor of ginger. They are great to enjoy with a meal, a cup of tea, or as a snack to take to work or school.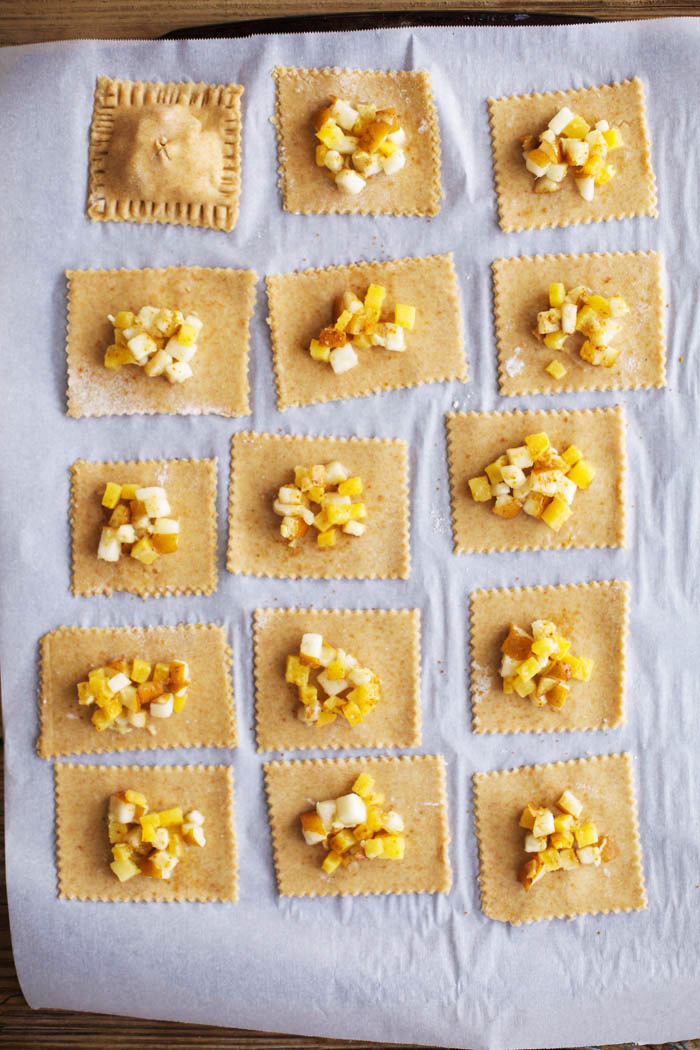
And since there are so many inspiring handpie recipes in the world already, I thought I’d share my (most likely incomplete) list:
1. Despite how it may seem now, summer is not far – soon will be time to make Laura’s Strawberry Handpies and maybe even the ice cream too?
2. Lindsey’s gluten free Cranberry Poptarts with Ginger Glaze will definitely be in my dreams until the next cranberry season.
3. Ashlae’s mouthwatering Blackberry Jam Pies so beautifully presented by her inspiring photography.
4. Beth is a true handpie master, making all kinds of flavors work in her pie fillings – Muscadine Rose Handpies, White Peach Rose Basil Handpies, Blueberry Basil Goat Cheese Handpies.
5. Shauna’s dreamy Savoury Handpies, which gave me the idea to use rutabaga in mine. 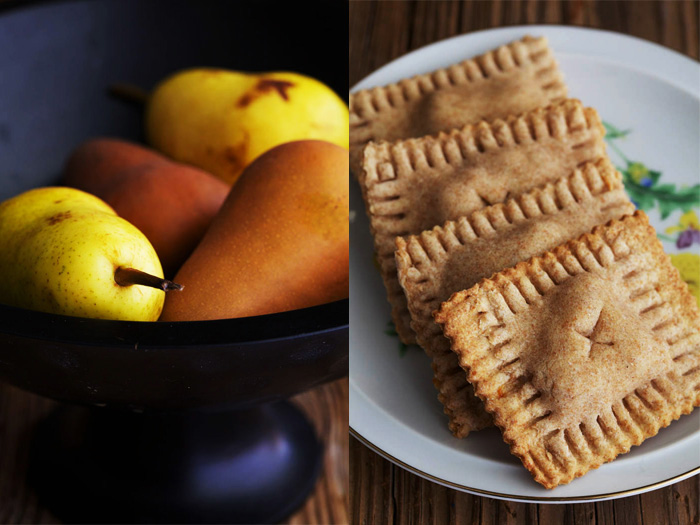
Gingery Rutabaga and Pear Handpies
makes about 15 handpies
for the dough
1 1/4 cups sprouted or whole spelt flour, or half each sprouted/whole and light spelt flour
1 teaspoon sea salt
1/2 tablespoon coconut sugar
generous 1/4 cup coconut oil – solid
2-3 tablespoons ice-cold water
for the filling
1/2 small yellow onion – diced
1 inch piece of fresh ginger root – peeled and minced
couple sprigs fresh thyme – optional
1/8 rutabaga – peeled and diced
pinch of sea salt
freshly ground black pepper – optional
1 ripe but firm pear – cored and diced
coconut sugar for sprinkling
to make the dough
1. Place the flour, salt and sugar in a food processor and pulse to mix.
2. Cut the coconut oil into small pieces and add to the food processor. Pulse until incorporated.
3. Add 2 tablespoons ice water and pulse until the dough comes together when pressed between fingers. If it’s too dry, add one more tablespoon of water.
4. Form a disc with the dough, wrap it in plastic wrap and refrigerate while making the filling.
to make the filling
1. Warm up about 1 tablespoon olive oil in a medium skillet. Add onion, ginger and thyme and cook, stirring, at medium heat for about 4 minutes.
2. Add in rutabaga, salt and pepper and cook for another 7-8 minutes.
3. Let cool slightly, then stir in the pear.
to make the handpies
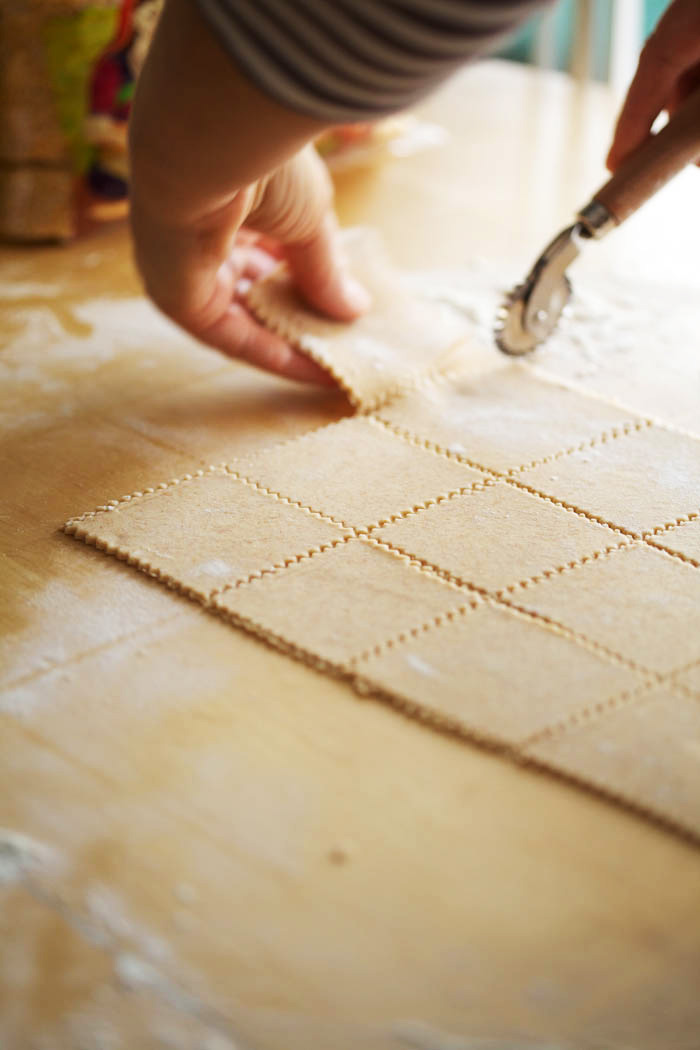
1. Preheat oven to 375F (190C). Roll the dough on a lightly floured surface, to 1/8-inch thickness. Cut the dough into any shapes you prefer, using a pastry or cookie cutter, ravioli stamp or a shot glass. Reshape, re-roll and cut more, until all of the dough is used up.
2. Arrange half of the cut pieces on a parchment paper covered baking sheet. Spoon a small amount of filling on each piece and lightly sprinkle with coconut sugar. Cover with the rest of the dough sheets and press around the edges with a fork.
3. Place the tray into the freezer for 10 minutes. Take it out and quickly score or prick the tops to allow the steam to escape. Bake for 15-20 minutes until golden around the edges. Let cool. Store for about 3 days in an airtight container at cool temperature.
Tags: ginger, pear, rutabaga, snack
 Tweet
Tweet
March 16th, 2014
One of the best things about the warm winter here in St. Petersburg, Florida is our Saturday morning market. Situated right on the waterfront in the heart of downtown, the market buzzes with crowds of people, who come here to enjoy the live music, plenty of sunshine, beautiful local produce, and the array of ethnic food stands. Produce from the local organic Warden farm has become so popular in the past few years, that we have to get up earlier on Saturdays if we want to get there before all the red baby kale, salad turnips, huge bushes of fragrant herbs, and lots of other amazing things are sold out.
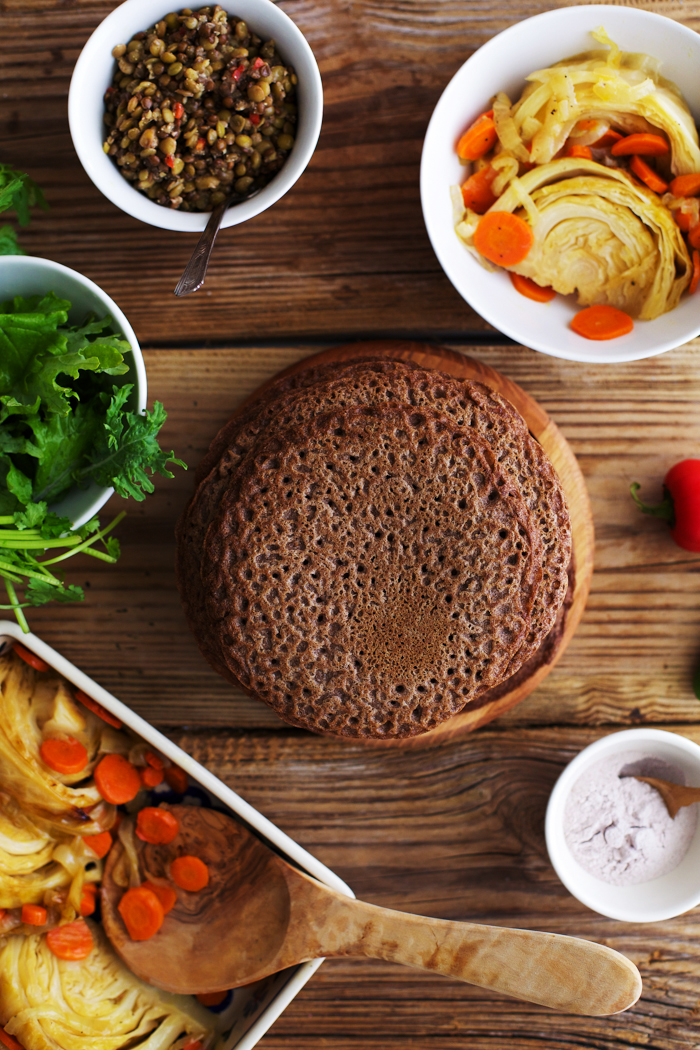
Somehow, it’s become a tradition among our circle of friends to meet by the Ethiopian kiosk for some spicy vegan fare every Saturday, after packing our bags full of local produce. The food there is very simple yet flavorful and fresh. I, along with most of our friends, prefer their lentils and cabbage with the spongy sour bread, injera, which is traditionally used in place of utensils and pairs perfectly with spicy food.
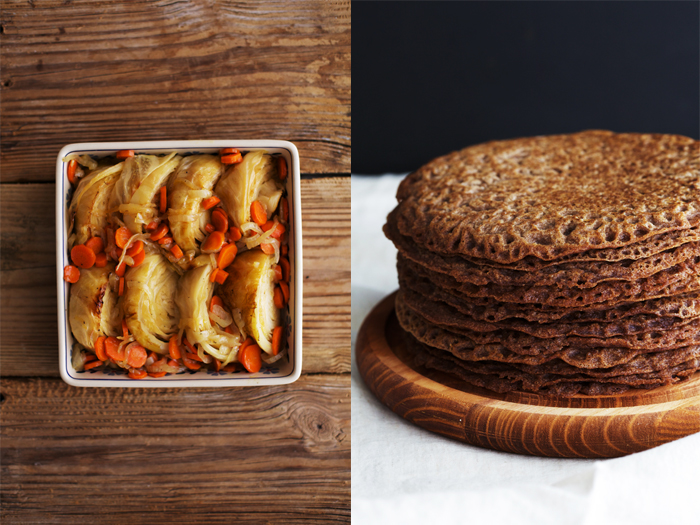
Of course, being as cooking crazed as I am, I presented myself with the challenge of recreating the injera bread recipe at home, which turned out to be quite an easy and interesting process. I found out that traditional Ethiopian injera is made of teff flour, native to Ethiopia, which I never used before. After experimenting with teff, I can justify that it tastes just like rye, only it’s gluten free. It has a slightly grainier texture than rye and is very nutritious. I happen to absolutely love the taste of rye, so teff won my heart right away. After making my own injera from 100% teff flour, I realized that our Ethiopian vendors from the market add wheat to their injera, which would make the process a bit easier. It’s like that time I tried to make sourdough bread both completely gluten free and with gluten – the glutenous recipe went much smoother, and there is no need to add yeast in this case. But I decided to stick to the gluten-free injera, which is not complicated or labour intensive to make at all, but takes five days of waiting for the teff mixture to ferment. A word of warning – the starter has an unpleasant smell during the process, and not in the fruity, cozy way that a wheat sourdough starter does. Once bread is cooked, the smell disappears and the taste is wonderfully earthy.
I looked to an Ethiopian recipe to recreate the Mustard Lentils, while the Braised Cabbage recipe is my own idea of tasty cabbage inspired by our Ethiopian market stand.

Ethiopian Injera
(adapted from here)
to make the starter
1/2 cup teff flour
1/8 teaspoon dry active yeast
3/4 cup water at 70 F (20 C)
1. Whisk all the ingredients in a bowl or a glass jar, cover with something breathable like cheesecloth and leave to rest at room temperature for 2 days. You should see some rising along the way.
2. Stir the starter – it will smell very grassy, almost in a spoiled kind of way (it might even make you think that it went bad – it likely did not). Resist the urge to throw it away, the smell indicates fermentation and that’s what we’re looking for. You also should see bubbles on the surface. Feed the starter with 1/3 cup teff flour and 1/2 cup water, cover and leave to ferment for another 2 days.
3. The starter may separate into two layers at this point – that’s fine. Stir it and feed with another 1/3 cup teff flour and 1/2 cup water. Cover and let ferment for at least another 4 hours or overnight. After that, your starter is ready.
to make the injera
1/4 cup starter from above
1 3/4 cups water at room temperature
1 3/4 cups teff flour
generous pinch of sea salt
1. In a large bowl, dissolve the starter in water. Add in the flour and whisk into a smooth pancake batter. Cover and let it ferment for 5-6 hours. Reserve 1/4 cup of starter for the next batch if desired.
2. Add in salt, whisk again to dissolve and begin cooking the injera. Optionally, you can add 1/2 teaspoon of baking soda to get more bubbles.
3. Heat a non-stick pan or a skillet with a tight-fitting lid over medium heat. Lightly grease it with vegetable oil using a paper towel.
4. Add about 1/3 to 1/2 cup of batter to the pan, depending on its size, tilting it and swirling the batter to cover the surface evenly. Cook for about 1 minute until bubbles appear on the surface.
5. Cover with a lid and steam the injera for about 3 minutes, until the top is set and the bread easily pulls off the pan. No need to flip it over. Remove it and continue with the rest of the batter. It will take a few tries to get the temperature and the cooking time just right.
6. Keep the cooked injera covered and warm. Serve with any spicy dish like this lentil salad.
Braised Cabbage
1 medium cabbage head – cut into 8 wedges
2 medium carrots – peeled and diced
1 large onion – peeled and sliced
3 tablespoons olive oil
1/4 cup vegetable broth or water
sea salt and freshly ground black pepper – to taste
pinch red pepper flakes – optional
1 teaspoon turmeric – optional
1. Preheat oven to 325 F (160 C). Snuggly arrange the cabbage wedges in a lightly oiled baking dish. Drizzle olive oil and broth/water over it, followed by salt, pepper and turmeric, if using.
2. Cover with foil and braise for 1 hour. Remove the dish from the oven and carefully flip the cabbage wedges. Braise for another hour. Increase oven temperature to 400 F (200 C).
3. Remove the foil and place the dish back into the oven for another 15-20 minutes, until the cabbage is golden brown.
Mustard Lentils
1 cup lentils (I used puy, but green or black would work just as well)
1 teaspoon black mustard seeds
1/2 teaspoon black peppercorns
1 teaspoon sea salt
pinch of cayenne pepper
juice of 2 small or 1 large lemon
3 tablespoons olive oil
1 chile or jalapeno – seeded and minced
1. Cook the lentils in plenty of salted water until soft, 15 minutes or so, depending on the type of lentils.
2. Grind the mustard seeds and peppercorns in a mortar and pestle. Add in the salt and cayenne and pour 1 tablespoon of boiling water over the spices. Add lemon juice and olive oil, stir to combine.
3. Add the chile/jalapeno into the lentils and pour the dressing over them. Toss well to combine, adjust salt.
Tags: bread, gluten free, lentils
Tweet
February 25th, 2014
This post is also available in: French
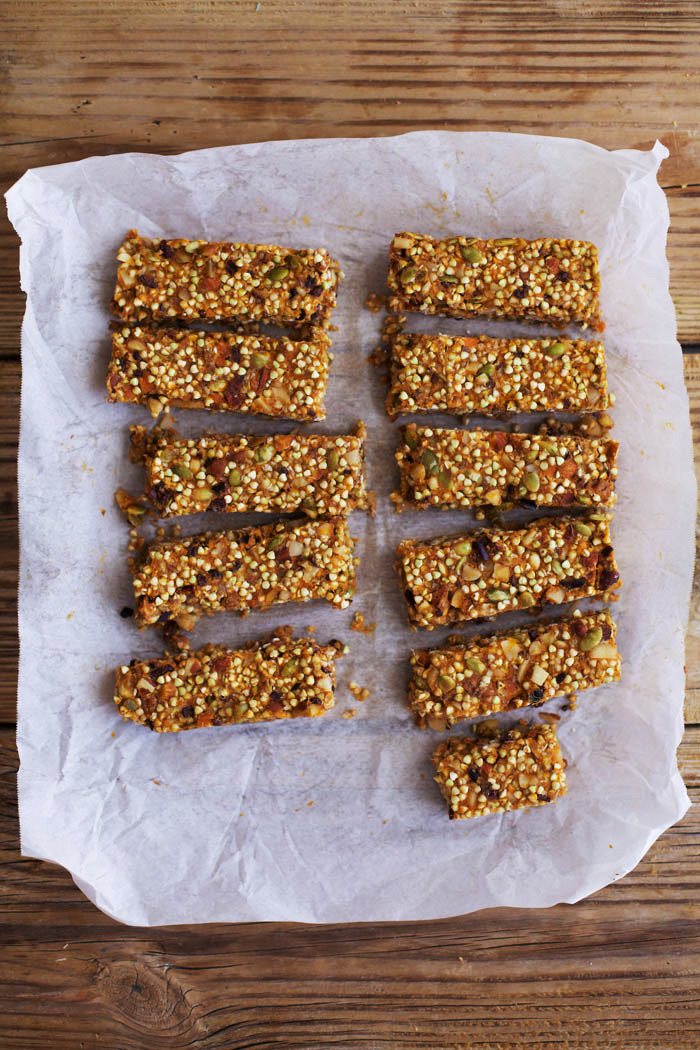
Granola bars have always presented somewhat of a challenge to me. I haven’t been able to find a wholesome store-bought granola bar that doesn’t taste like cardboard or isn’t too sweet. Have you? I’ve also had a hard time coming up with a good granola bar recipe myself, they often come out bland and overall boring. Still, I have been determined to have one delicious granola bar in my repertoire and these Sweet Potato Buckwheat Bars with cardamom have got to be it.
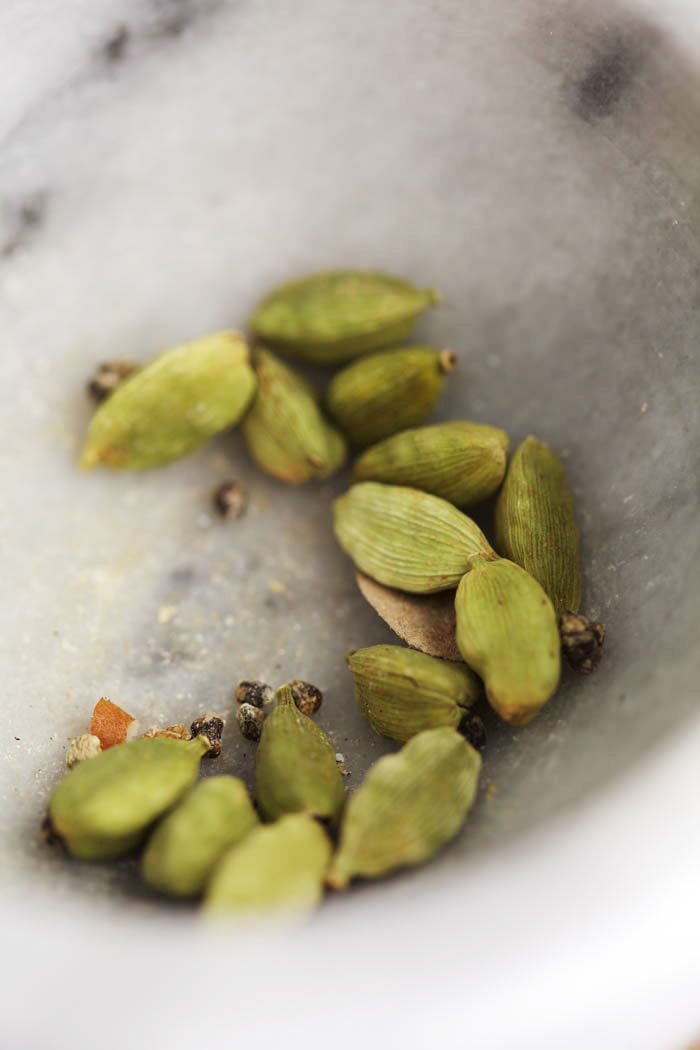
I can talk about my love for cardamom for hours – in my opinion, almost anything can benefit from its flavor. No wonder that it is one of the most expensive spices in the world, its taste is absolutely heavenly. A little cardamom goes a long way though – those little green pods are like little ticking bombs of flavour. I just learned about the existence of smoked cardamom, from here, and will surely include it the next time I make these bars.
The preparation here is quite simple – a few scoopfuls of very nutritious grains, nuts and seeds mixed with a kind of sweet potato ‘caramel.’ The bars are not only incredibly tasty but also densely nutritious and filling. Also, they are very flexible in preparation. My older daughter, Masha, who takes most of the photos for Golubka and lives in NYC, treats my recipes as any recent college grad would – simplifying them and using only the ingredients that fit a tight budget. She made these bars without cardamom, brown rice syrup and no nuts – just sunflower and pumpkin seeds, which are cheaper, all to very good results. She also tried baking them and loved what she ended up with. As variations, you can add cocoa nibs, dried coconut, dried fruit, hemp hearts, maca powder, sesame seeds, toasted rolled oats or quinoa flakes, different grain puffs, chia or flax seeds, and various nut butters. Just make sure to keep the dry to wet ratio the same.
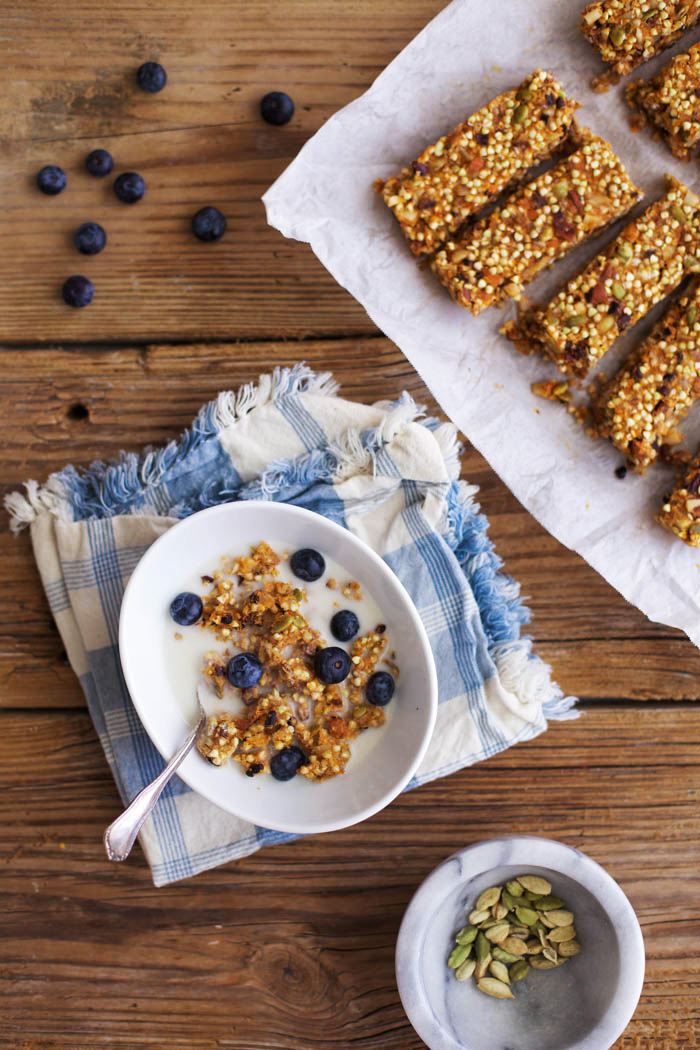
I talked about my love for winter Olympics in the last post, and it has been an incredible two weeks. Having these bars on hand (I made a double batch!) for the whole family to snack on and to include in Paloma’s lunchbox has been helpful, as my attention has been guided away from my kitchen and straight into Sochi.
Sweet Potato Buckwheat Snack Bars with Cardamom
1 1/2 cups raw buckwheat groats – soaked in water for a minimum of 1 hour, rinsed and dried completely, or quinoa puffs
1 small or 1/2 large sweet potato
1 heaping cup assorted nuts/seeds (I used 1/2 cup hazelnuts, 1/4 cup each almonds and pecans)
1/2 cup pumpkin or sunflower seeds, or a mixture of both
4 cardamom pods ground in a mortar and pestle
1/2 cup sesame tahini
1/2 cup almond butter
1/4 cup brown rice syrup
2 tablespoons honey
pinch sea salt
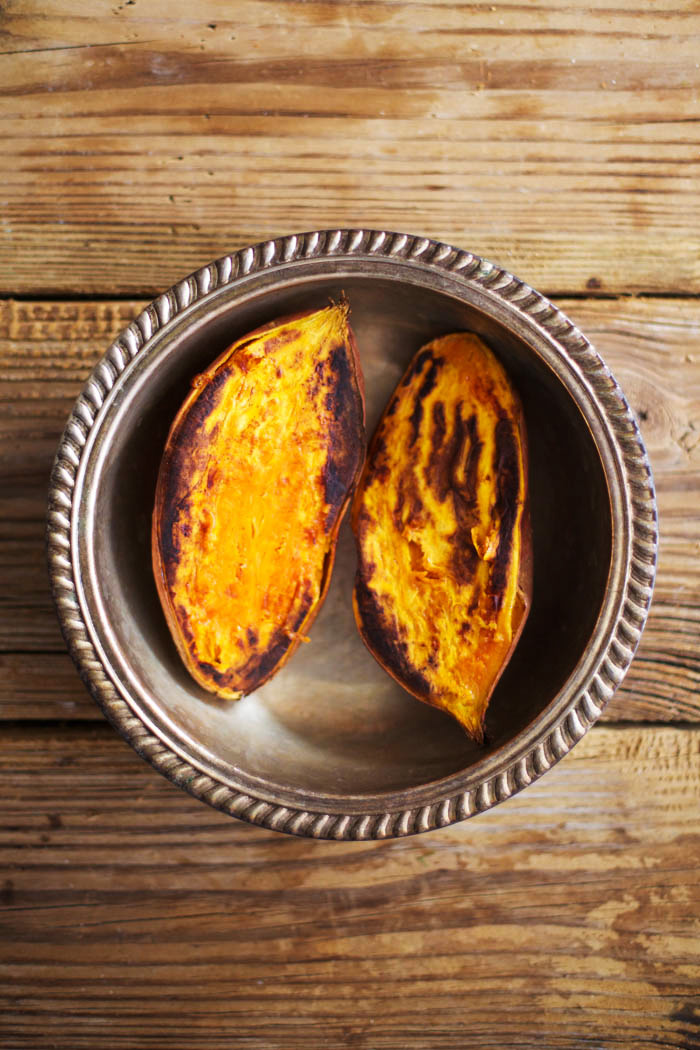
1. Preheat oven to 400 F (200 C). Prick sweet potato skin with a fork several times and bake for about 40 minutes or until soft throughout. Cool, peel and mash with a fork.
2. Lower the oven temperature to 350 F (180 C). Place nuts on a baking tray and toast for 10 minutes. Transfer onto a kitchen towel and remove the skins. Then toast your seeds for 5 minutes.
3. Add nuts to a food processor and pulse until broken into small to medium pieces. Combine the nuts, seeds and buckwheat groats in a large mixing bowl.
4. In a small saucepan, warm the brown rice syrup with honey, tahini and almond butter, mixing until well combined. Add in the sweet potato mash, salt and cardamom. Combine into a caramel like homogenous sauce. Pour it over the granola mixture and mix well.
5. Cover a 9 x 9 baking dish with parchment paper, extending it to the sides of the dish. Scoop the mixture into the dish, pressing it inside in a compact and even layer. Place into a freezer for about 30 minutes or until firm.
6. Remove from the baking dish and cut into bars. Keep refrigerated or even in the freezer – the bars will never be completely frozen, just perfectly chewy and crunchy at the same time.
Tags: breakfast, cardamom, snack, sweet potato
Tweet
February 9th, 2014

All politics aside, I love the winter Olympics. As the daughter and granddaughter of athletes, I grew up in a household that payed very much attention to all important sporting events. Winter Olympics was always our ultimate favourite, when all other things in life came to a sort of standstill and the whole family would be glued to the television, biting our nails and cheering (it got very loud at times!). This year’s Olympic games are even more special to me than usual. Sochi, the summer getaway town of my youth, where I stayed with my aunt in her ancient house with an outdoor shower and palm and fig trees in the backyard, holds an incredibly special place in my heart. I still dream about the cool, deep blue waters of the Black Sea and its pebbled beaches. The fact that the Games are taking place right there fills me with so much excitement, nostalgia, and pride. My cousins still live in Sochi and I get many daily, detailed, first-hand reports. I’ve always thought that Olympics should be about the olympians who invest their entire lives into this one time opportunity, and it saddens me when politics get in the way.
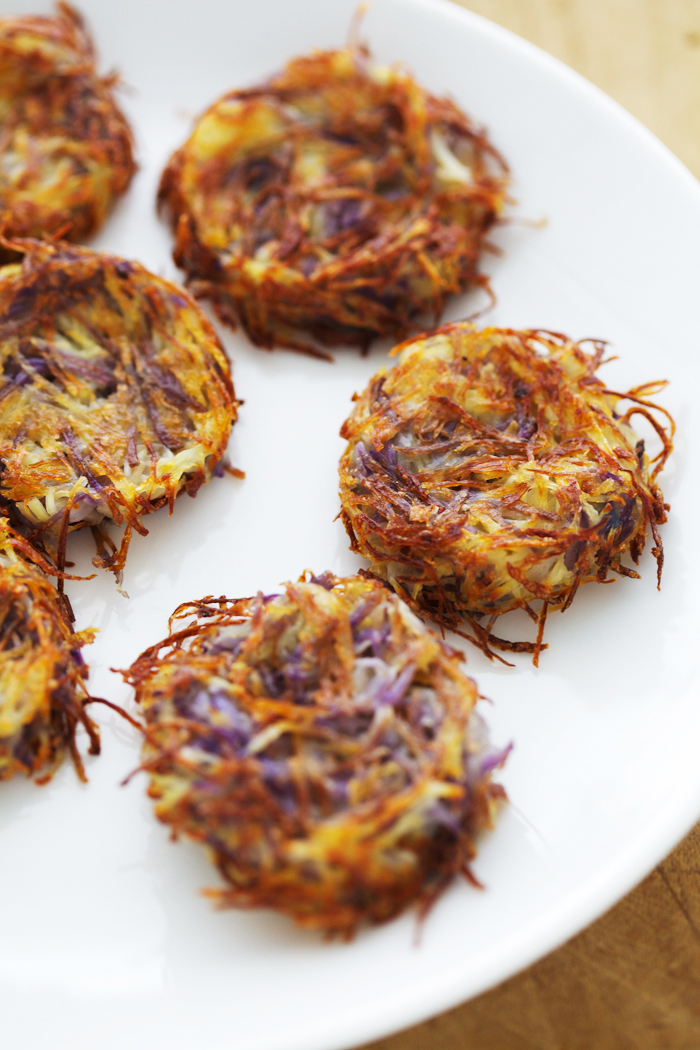
Now to the recipes. To me, this Russian-inspired comfort dish is the most appropriate one to make during the winter Olympics in Russia. If I absolutely had to choose my most beloved Russian dish, potato pancakes (draniki as we call them) would be the one. Traditionally fried, they don’t often appear on our table for obvious health reasons. This time I tried baking the latkes and was amazed by the little to no difference in taste. Great news for those of you who, like me, have an aversion to frying – goodbye to the greasy mess, smoke and achy stomach. And I can still indulge in my most beloved dish, once in a while.
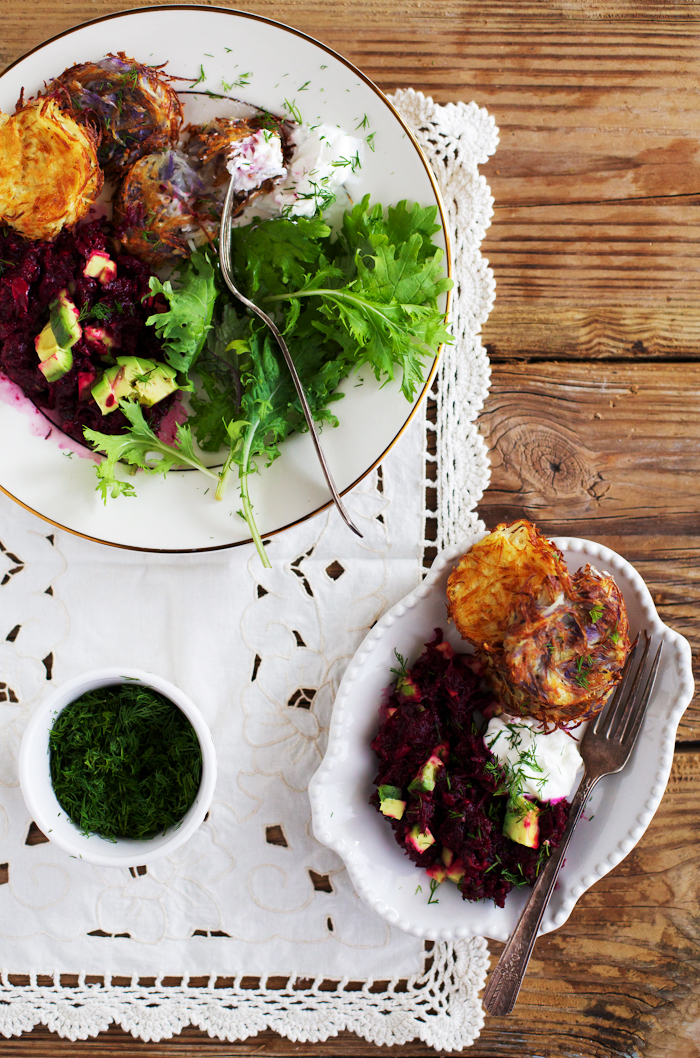
Beet salad is also a very common Russian side dish, usually made with mayonnaise and sometimes cheese. I replaced traditional mayo with an avocado ‘mayonnaise’ and eliminated the cheese. Another pleasant surprise, the taste is very similar, and even better!
My two favourite sports to watch are Ice Skating and Biathlon, back to that!
Baked Potato Latkes
Note: The amount of pancakes you end up with somewhat depends on the type of shredder that you use. I use a very sharp mandolin, with a shredding attachment that produces more volume than a regular box grater. For me, this recipe yields 30 small pancakes.
I make my baked latkes in a muffin pan, if you don’t have one, see #6 for alternate baking directions.
2 lb Yukon gold potatoes (or you can mix it up, I used Yukon and purple potatoes)
1 small yellow onion
1 egg
1/3 cup oat flour (grind rolled oats in a blender or food processor)
sea salt and freshly ground black pepper – to taste
olive oil for brushing
1. Peel and shred the potatoes. Place them into a colander and thoroughly rinse with cold water. Leave to drain in the colander, while peeling and shredding the onion.
2. Shake the water excess off the potatoes as much as possible and transfer them into a large bowl. Add in shredded onion, egg, flour, salt and pepper. Mix thoroughly.
3. Squeeze the mixture between your fingers, one small portion at a time, and try to make it as dry as possible. Preheat oven to 350 F (180 C).
4. Thoroughly grease a muffin pan(s) with olive oil. Distribute the potato mixture between muffin holes, pressing it into the bottom to achieve a regular pancake thickness. Brush with olive oil and bake for 40 minutes. Let cool slightly before removing pancakes from the holes.
5. Serve with sour cream/Greek yogurt and Beet-Avocado salad.
6. If you don’t have a muffin pan, preheat oven to 425 F (220 C). Cover a baking sheet with parchment paper and lightly grease it with olive oil. Form 12 pancakes with your hands, placing them on the sheet as you go. Press with a spoon to flatten them and brush with olive oil. Bake for 12 minutes, flip and brush the other side with oil as well. Bake for another 8 minutes, flipping one more time and bake for additional 5 minutes.
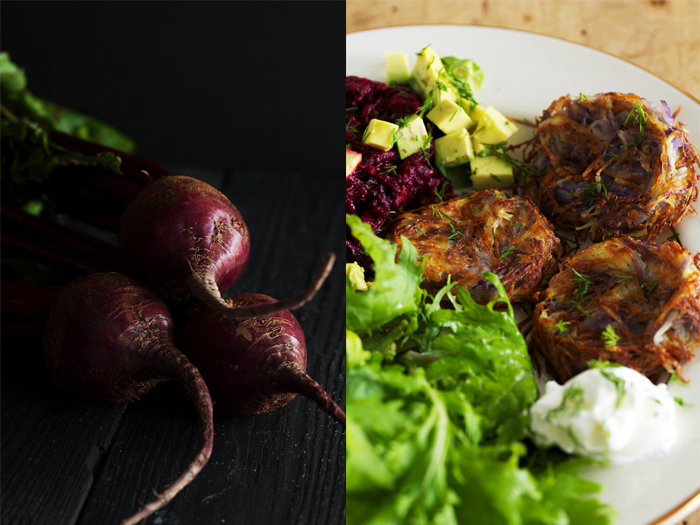
Beet Salad with Avocado Mayonnaise
4 small to medium beet roots
2 ripe but firm avocados
juice of 1 lemon
1 tablespoon olive oil
1 tablespoon Dijon mustard
sea salt and freshly ground black pepper – to taste
1 garlic clove – minced
about 1/3 cup minced parsley and dill
handful walnuts – chopped
1. Bake, boil or steam the beets until fully cooked. Cool, peel and shred them, placing into a large mixing bowl.
2. In a separate bowl, mash flesh of 1 avocado with a fork. Squeeze the juice of 1/2 lemon over it. Add olive oil, mustard, salt and pepper and mix thoroughly.
3. Add the avocado ‘mayo’ into the shredded beets, along with the garlic, herbs and walnuts. Mix well to incorporate. Adjust salt and pepper.
4. Right before serving, cut another avocado into cubes, squeeze the juice of the remaining 1/2 lemon over it and add to the salad.
Tags: avocado, beets, latkes, mains, potato, recipe
Tweet
 EMAIL
EMAIL
