Tart Recipes Recipes
19
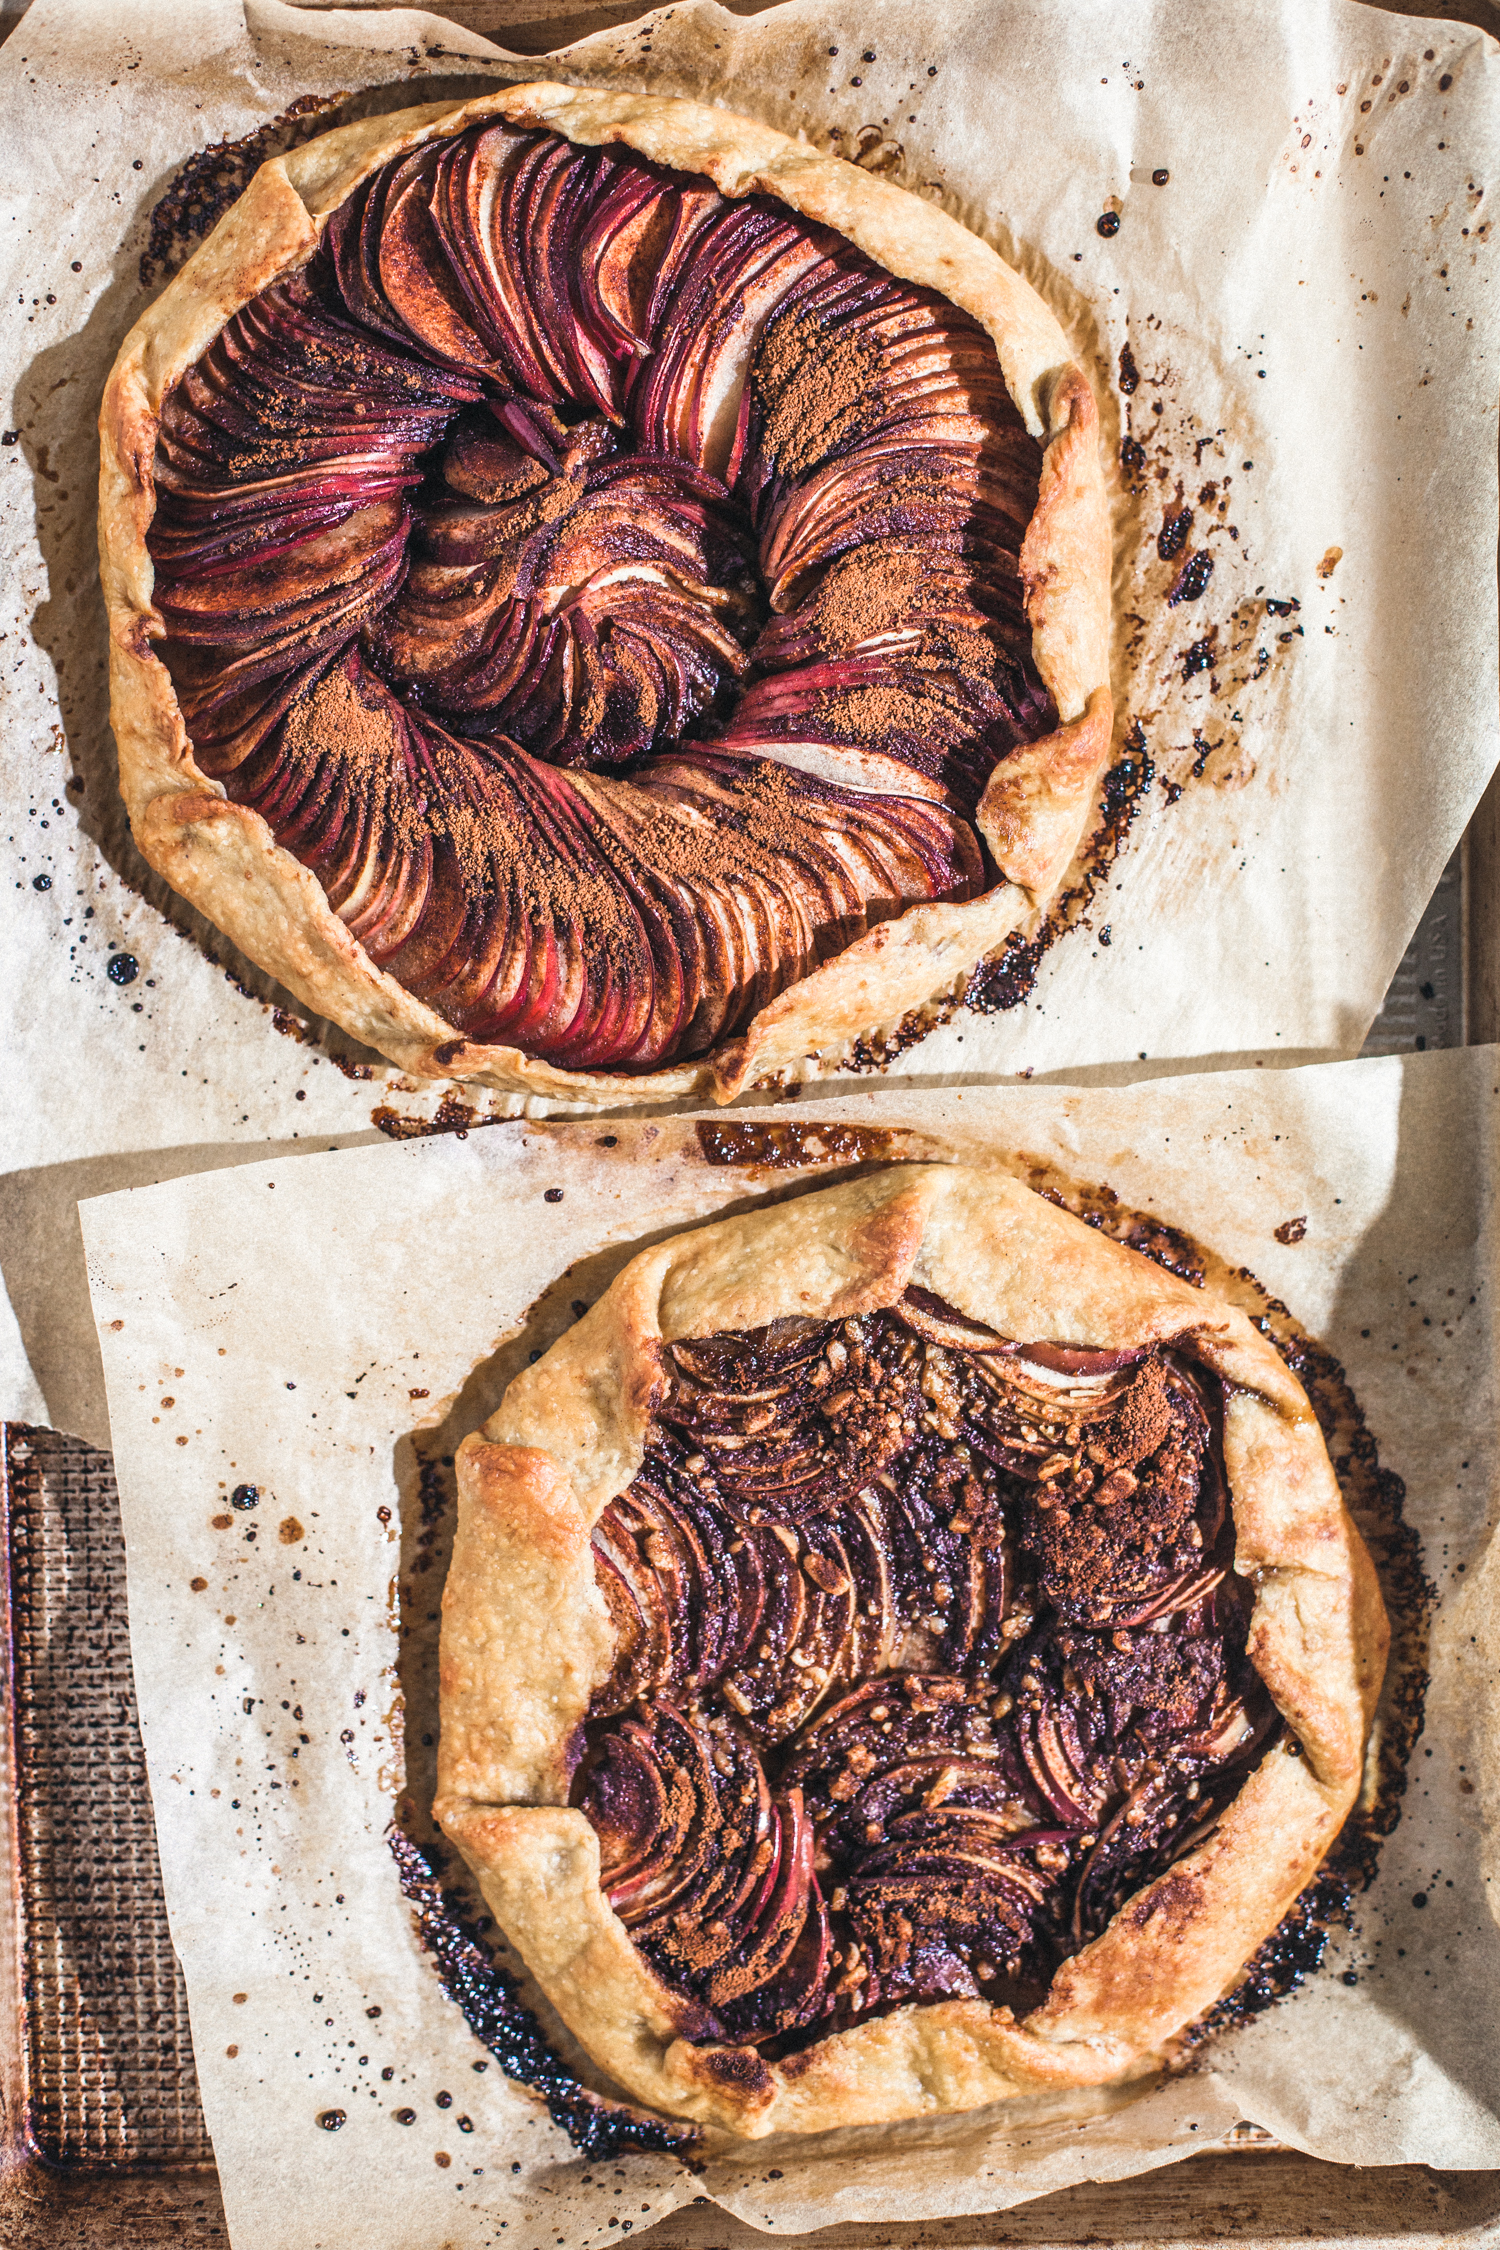
Apple Galette
by Masha
Read Recipe
Favorite Tomato Recipes
by Masha
Read Recipe
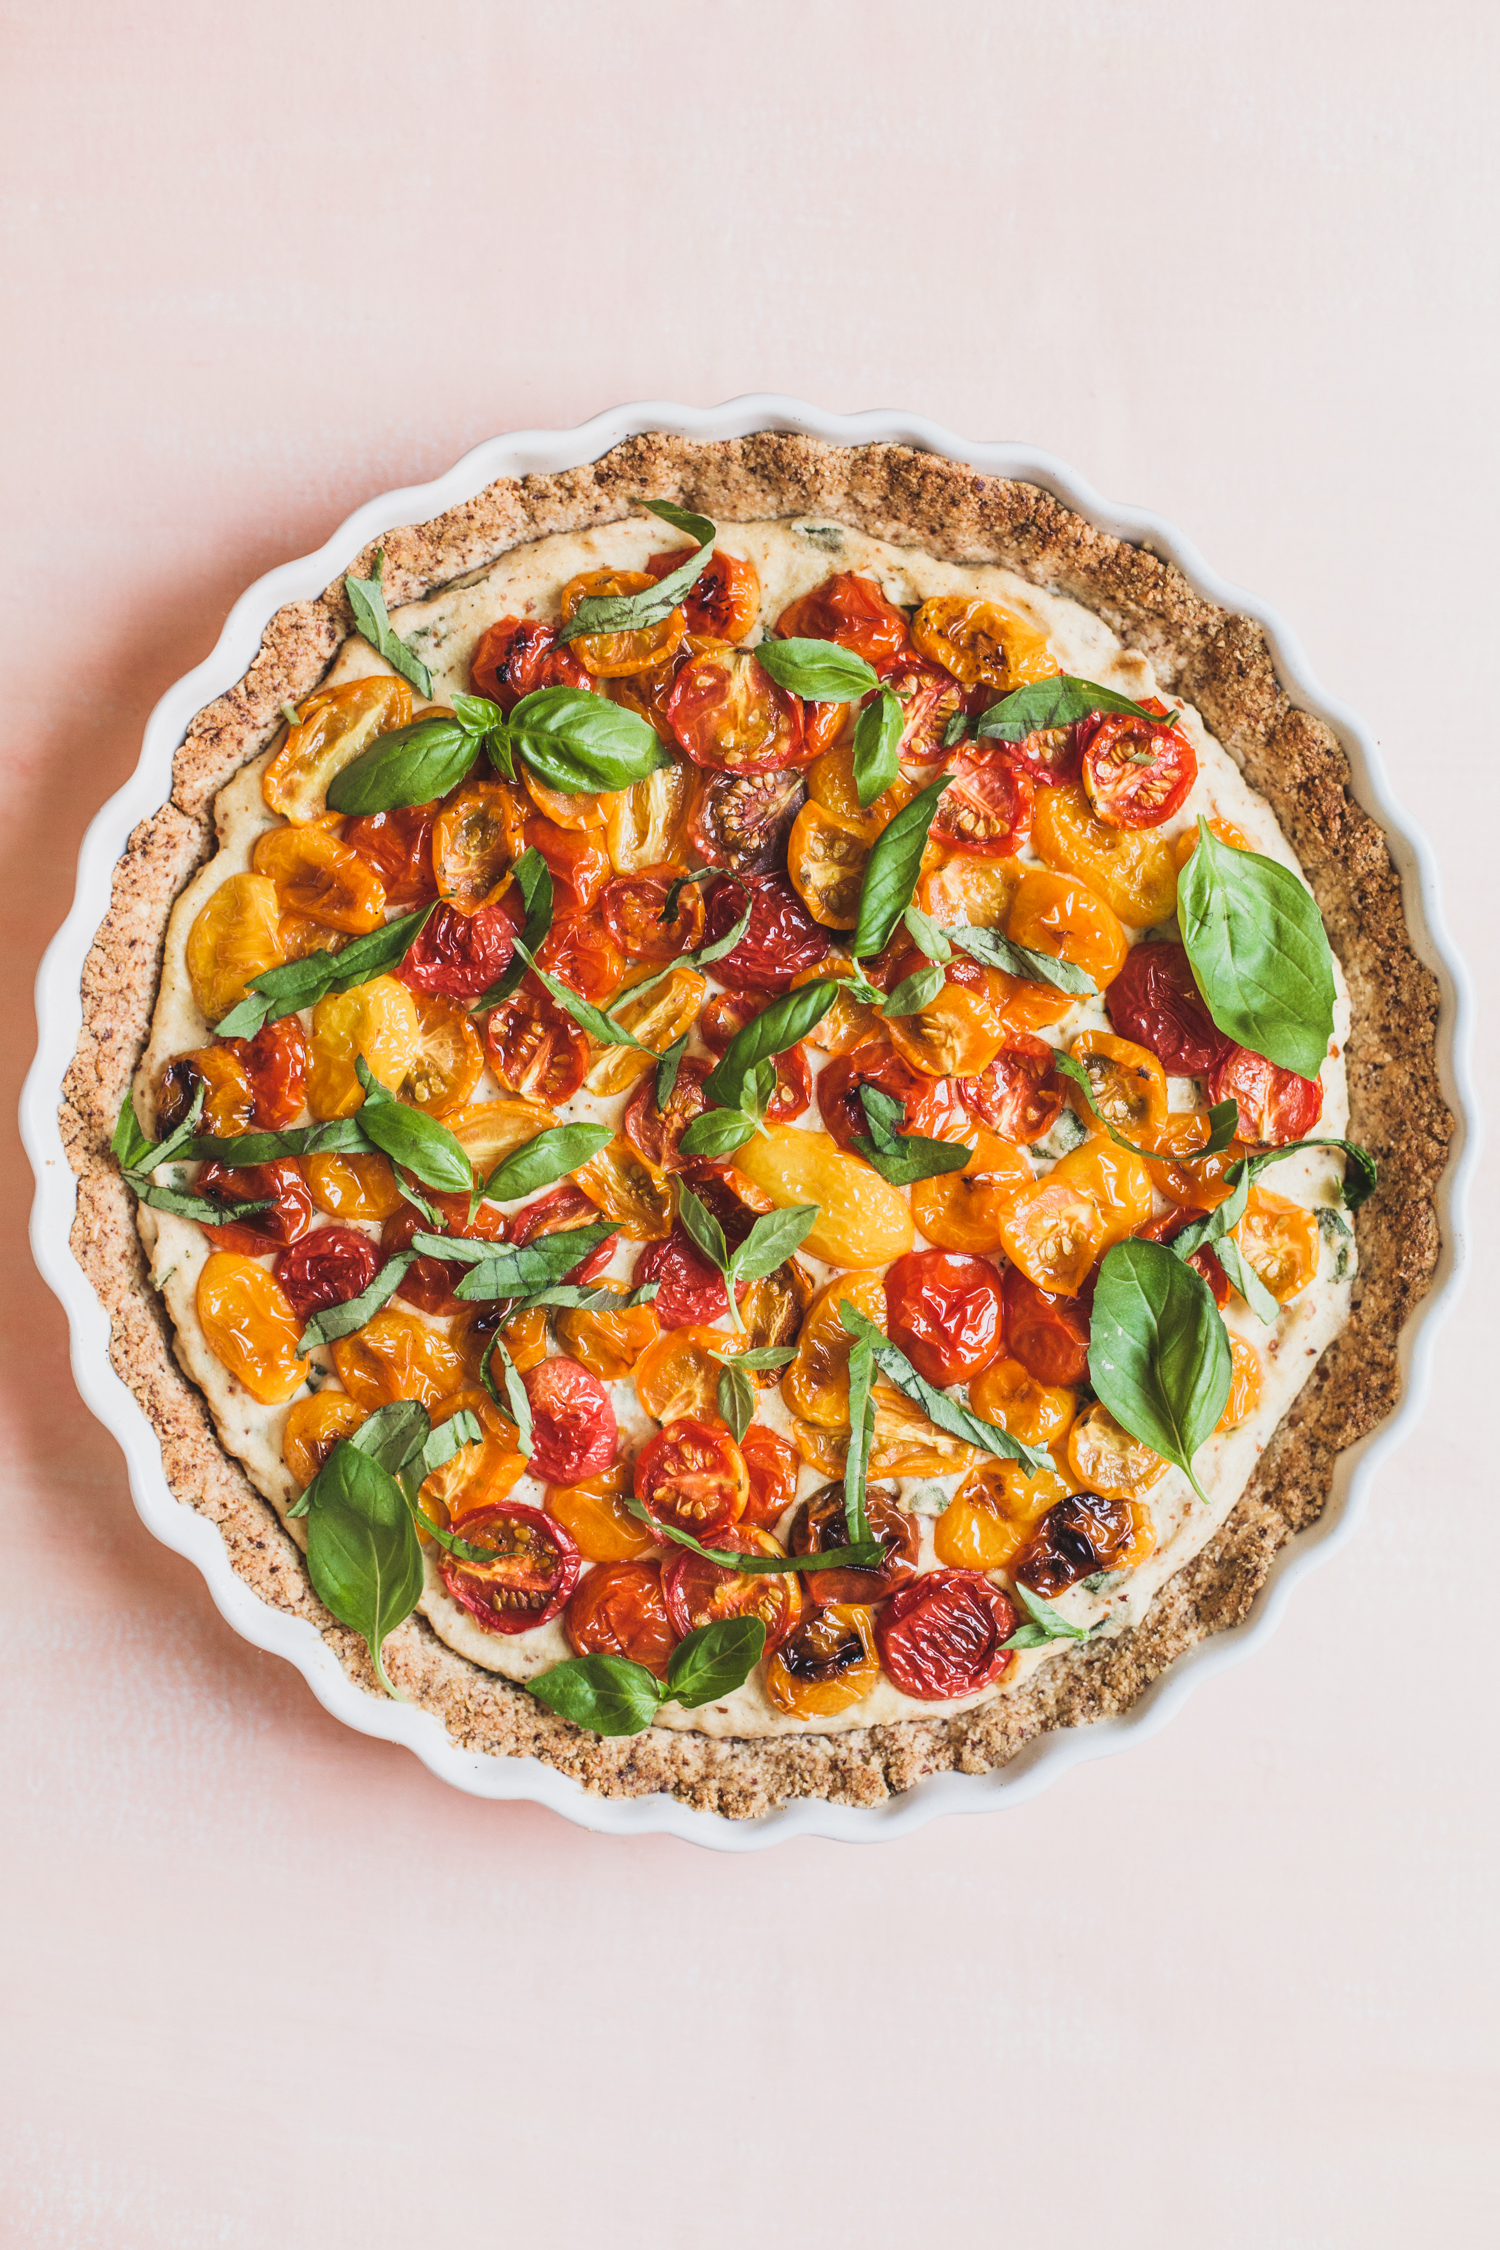
Grain-Free Tomato Tart with Cauliflower Ricotta
by Anya
Read Recipe
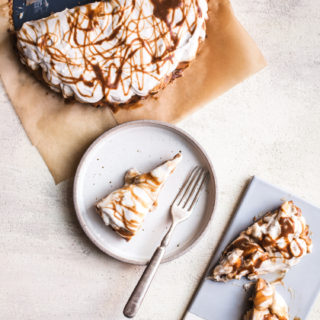
Salted Caramel Banana Cream Tart from Alternative Baker
by Anya
Read Recipe
Chocolate Matcha Tart with a Sesame Crust
by Anya
Read Recipe
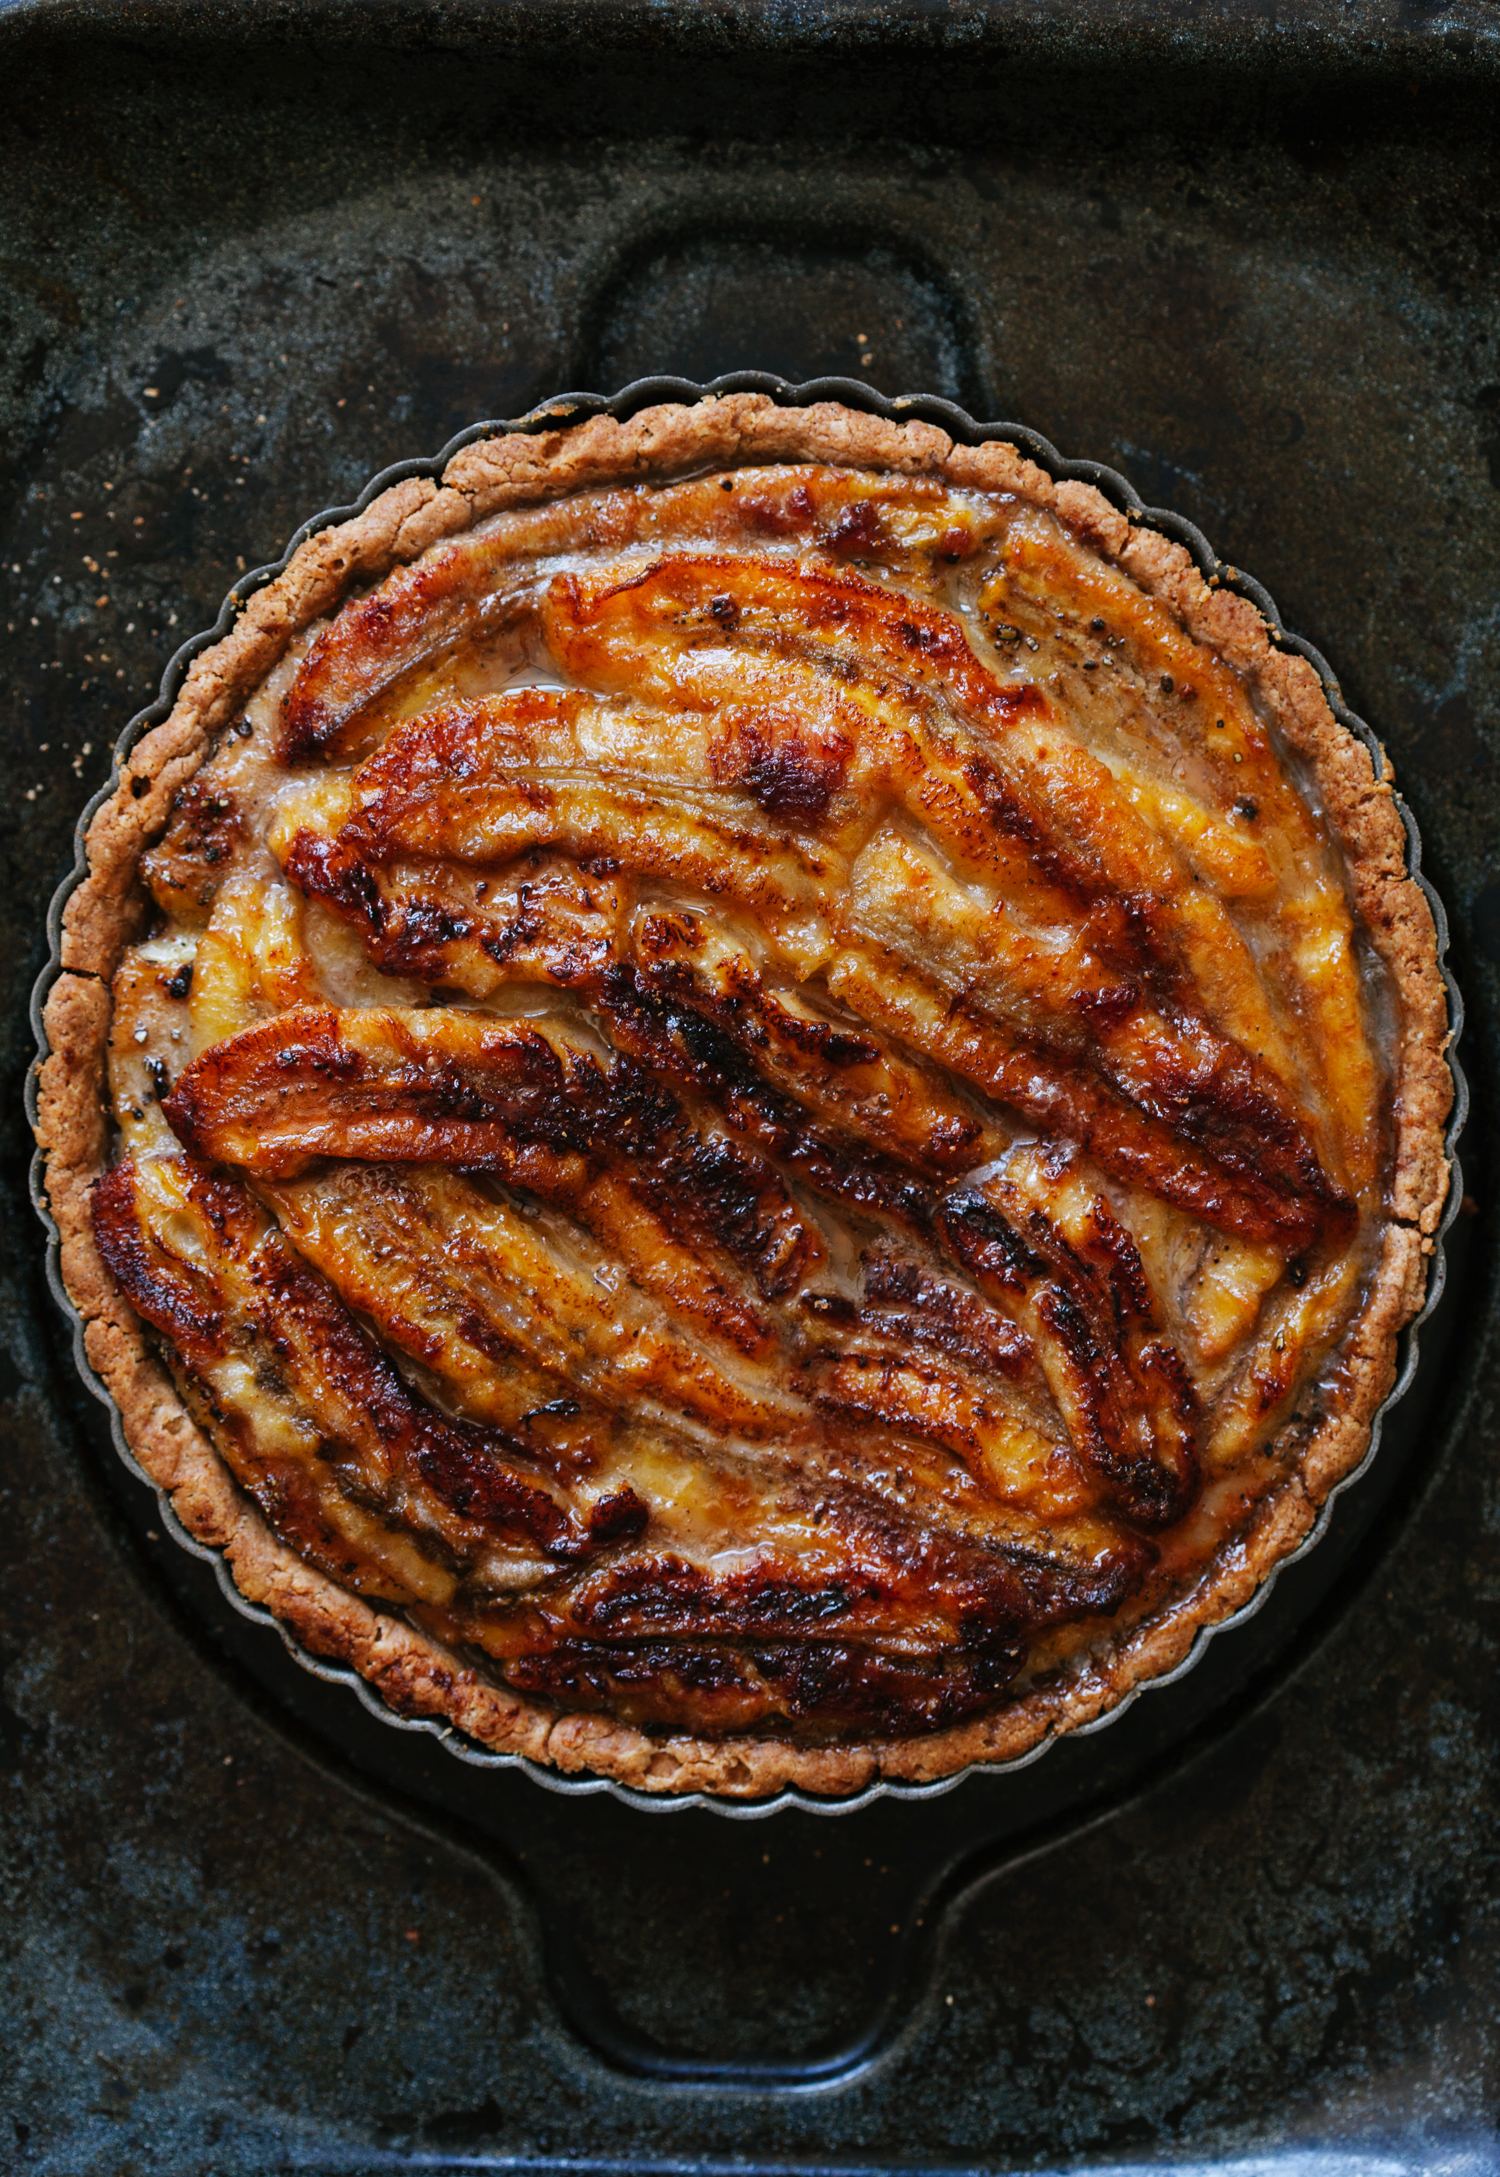
Banana Toffee Tart
by Anya
Read Recipe
White Chocolate Blood Orange Mousse Tart
by Anya
Read Recipe
Ricotta Fig Tart with Chocolate and Roasted Grapes
by Anya
Read Recipe
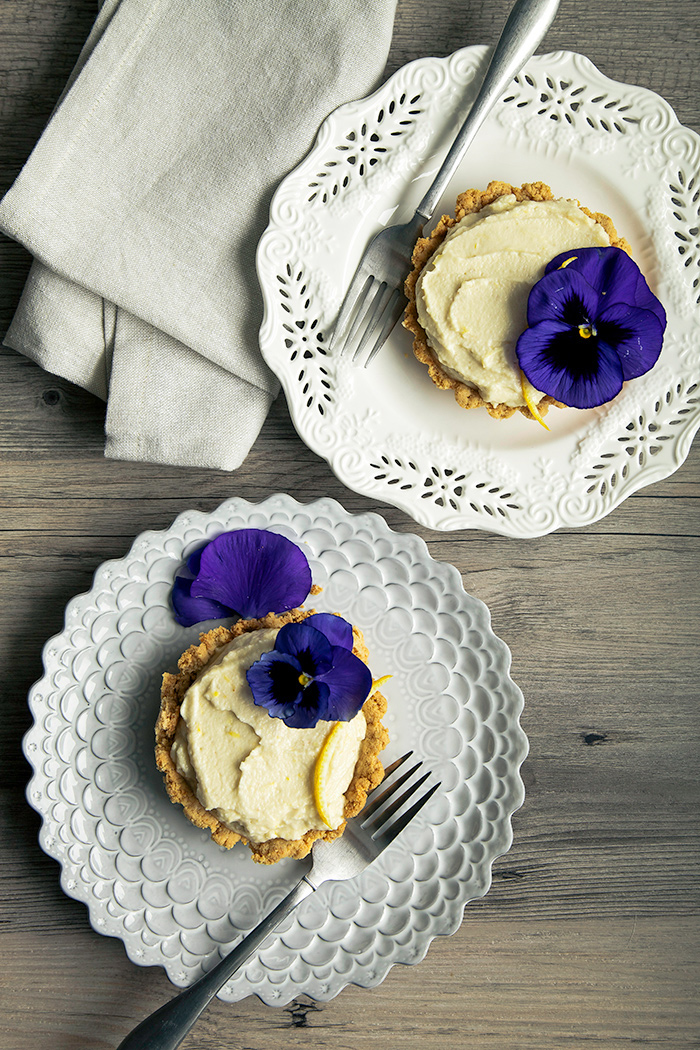
Lemon Tarts from Laura at The First Mess
by Anya
Read Recipe
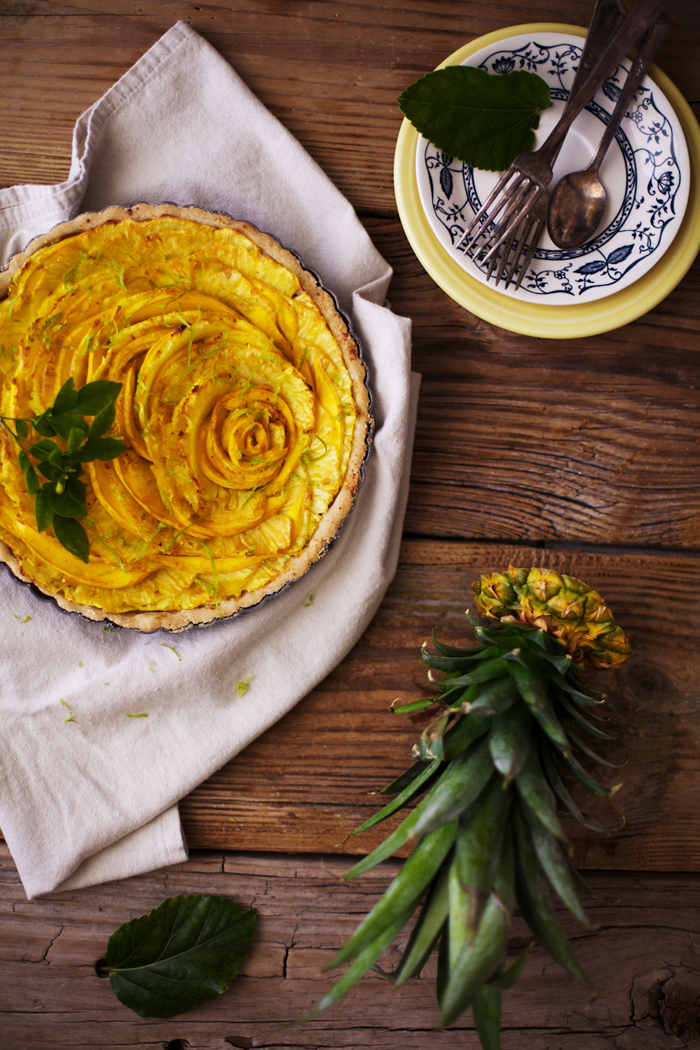
Pineapple and Mango Tart
by Anya
Read Recipe
Rooibos Poached Pear Tart
by Anya
Read Recipe
Raw Apricot Lavender Tart and a Giveaway
by Anya
Read Recipe
Peach and Raspberry Summer Tart and a Guest Post for Scandi Foodie
by Anya
Read Recipe
Raw Fruit Tarts
by Anya
Read Recipe
Raw Caramelized Vegetables in Crispy Coconut Cups
by Anya
Read Recipe
Raw Sun Dried Tomato, Basil, and Olive Tart
by Anya
Read Recipe
Raw Chocolate Persimmon Tart and a Guest Post at Green Kitchen Stories
by Anya
Read Recipe
Raw Berry Tarts with a Peach and Herb Sorbet
by Anya
Read Recipe
Raw Blackberry and Lime Miniature Tarts with Cardamom Ice Cream
by Anya
Read Recipe